
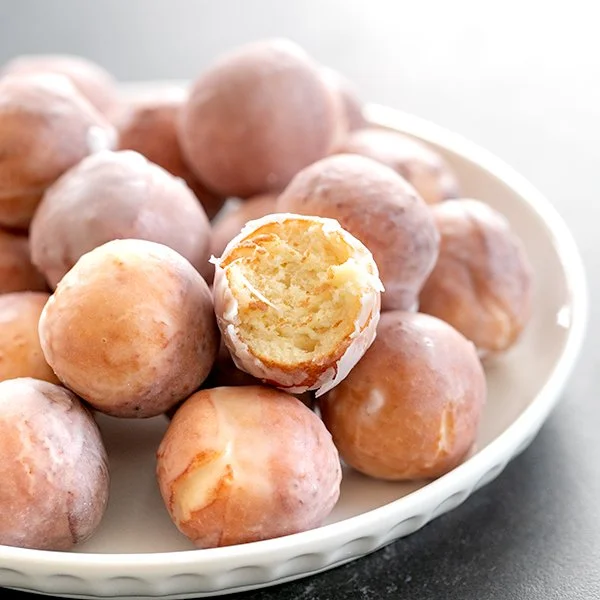
Glazed Gluten Free Donut Holes | Like Munchikins are the perfect treat for anyone craving a sweet, nostalgic dessert that echoes the joy of childhood. Soft, airy, and coated in a luscious glaze, these donut holes make for a delightful indulgence at breakfast, an afternoon snack, or a sweet treat to celebrate any occasion. This recipe provides a straightforward, step-by-step guide to creating these scrumptious donut holes at home, making it easy and accessible for all bakers, whether you’re a novice or a pro.
Ingredients
To make the glorious Glazed Gluten Free Donut Holes, you will need the following ingredients:
- Gluten Free Yeast-Raised Donut Dough: The star of the show, this dough provides the perfect structure and texture for airy, melt-in-your-mouth donut holes.
- Oil for Frying: A combination of equal parts canola oil and Spectrum nonhydrogenated vegetable shortening will yield crispy, golden donut holes.
- Confectioners’ Sugar: This powdered sugar is essential for creating the sweet, glossy glaze that makes these treats so irresistible.
- Milk: Any kind will do! This creamy element, added to the glaze, contributes to its smooth and pourable consistency.
Step-by-Step Directions
-
Prepare the Dough: Begin by making the gluten-free yeast-raised donut dough according to the relevant recipe instructions, focusing on achieving a smooth and elastic texture.
-
Chill the Dough: Once your dough is ready, place it in a lightly greased container. Cover it securely and refrigerate for about an hour. If you have time, allow it to rest for up to two days. This chilling process enhances the flavor and makes the dough easier to handle.
-
Knead the Dough: After chilling, turn out the dough onto a lightly floured surface. Using a floured bench scraper, knead gently by scraping, folding, and repeating until smooth. Be careful not to overwork the dough to maintain its lightness.
-
Shape the Donut Holes: Flatten the dough to about an inch thick. Use a floured round cookie cutter, about 1.5 inches in diameter, to cut out your donut holes. Place them on a parchment-lined baking sheet, leaving about half an inch between each.
-
Let Them Rise: Cover the baking sheet with lightly oiled plastic wrap and let the donut holes rise in a warm, draft-free area for about 30 minutes, or until puffed.
-
Heat the Oil: As the donuts rise, pour oil into a medium-sized, heavy-bottom pot or fryer. Position a deep-fry thermometer and heat the oil over medium-high until it reaches 350°F.
-
Fry the Donut Holes: Carefully place a few donut holes at a time into the hot oil. Fry them until they turn a light golden brown, approximately 1 to 2 minutes on each side. Remove them and let them drain on a wire rack lined with paper towels.
-
Make the Glaze: In a small bowl, combine the confectioners’ sugar and 1 tablespoon of milk. Stir until you form a thick paste. Adjust the consistency by adding milk drop by drop until you achieve a thick but pourable glaze.
-
Glaze the Donut Holes: Dip each cooled donut hole into the glaze, allowing any excess to drip off. Place them back on the wire rack to let the glaze set at room temperature.
Tips & Tricks
- Timing Is Key: For the best texture, allow your donut dough to chill for at least an hour, but for improved flavor, try letting it rest longer. The longer the dough sits, the more developed the flavors will be.
- Avoid Overcrowding: When frying, don’t overcrowd the pot. Fry in small batches to maintain the oil temperature, ensuring even cooking and perfect browning.
- Perfect Glaze Consistency: When adjusting your glaze, add milk very slowly. It’s much easier to thin the glaze than to thicken it if you accidentally make it too runny.
Serving Suggestions & Pairings
Serve these Glazed Gluten Free Donut Holes warm for the best experience. Pair them with a steaming cup of coffee or a glass of homemade hot cocoa for a cozy afternoon treat. They also make a beautiful addition to holiday brunches or children’s parties, appealing to both kids and adults alike.
Nutritional Information
This recipe yields approximately 24 donut holes. Each donut hole contains roughly 100-120 calories, depending on your specific recipe variations. While they are a delightful treat, opt to enjoy them in moderation to maintain a balanced diet alongside nutritious meals.
Storing Tips & Variations
To store leftover donut holes, keep them in an airtight container at room temperature for up to two days. For longer storage, freeze them individually and store them in a freezer-safe bag. To reheat, pop them in the microwave for a few seconds or a warm oven for a freshly baked taste.
Variations are endless! Consider adding spices like nutmeg or cinnamon to the dough or experimenting with flavored glazes, such as vanilla or chocolate, for added flair.
Conclusion
If you’re ready to indulge in these delightful Glazed Gluten Free Donut Holes, of course, you should! Their soft, airy texture combined with a sweet glaze makes them a comforting treat anyone can enjoy. Try the recipe today and don’t forget to share your delicious results!
FAQs
-
Can I make these donut holes dairy-free?
Yes! Substitute non-dairy milk in the glaze (like almond or oat milk) for a dairy-free version. -
How should I store leftover donut holes?
Keep them in an airtight container at room temperature for up to two days or freeze for longer preservation. -
Can I bake these instead of frying?
While these donut holes are traditionally fried for the best texture, you can try baking them at 350°F for about 12-15 minutes for a lighter alternative. -
What can I do if my glaze is too thick?
If your glaze is too thick, gradually add more milk until you achieve the desired pourable consistency. -
How can I make these donut holes more flavorful?
Feel free to add vanilla extract or citrus zest into the dough for extra flavor. You can also mix in chocolate chips or chopped nuts for added texture and taste.
Glazed Gluten Free Donut Holes
Ingredients
Method
- Prepare the dough according to the relevant recipe instructions, focusing on achieving a smooth and elastic texture.
- Once the dough is ready, place it in a lightly greased container and refrigerate for about an hour, or up to two days for enhanced flavor.
- After chilling, turn out the dough onto a lightly floured surface and knead gently until smooth.
- Flatten the dough to about an inch thick and cut out donut holes using a floured round cookie cutter.
- Place them on a parchment-lined baking sheet, leaving space between each.
- Let the donut holes rise in a warm area for about 30 minutes until puffed.
- Heat oil in a heavy-bottom pot to 350°F using a deep-fry thermometer.
- Carefully fry the donut holes in small batches until golden brown, about 1 to 2 minutes on each side.
- Remove them and let them drain on a wire rack lined with paper towels.
- In a small bowl, mix the confectioners’ sugar and milk until you have a thick paste. Adjust with milk to achieve a pourable glaze.
- Dip each cooled donut hole into the glaze and place them back on the wire rack to let the glaze set.




Leave a Reply